Do Nail Hardeners Really Work?
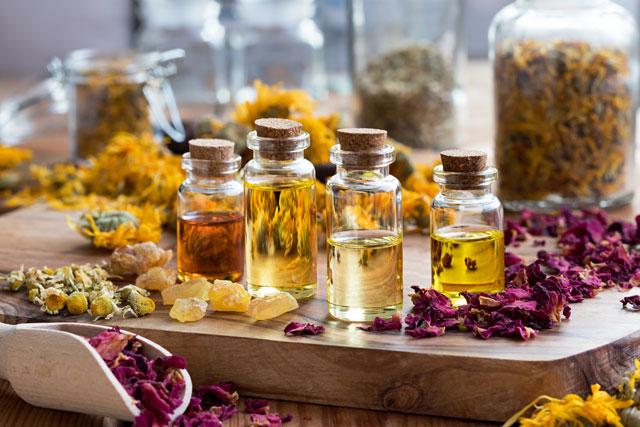
Nail hardeners are used to strengthen or harden natural nails. They occupy less than one-percent of the entire category of nail polish and treatments and are not without controversy. Most nail hardeners use formalin (methylene glycol dissolved in water) as the nail hardening ingredient. It is claimed nail hardeners have been used safely for many decades. The primary concern is skin sensitivity and allergy. Nail hardener manufacturer's use less than one-half the levels of formalin allowed by the government authorities.
The following is a statement issued by the Nail Manufacturers Council (NMC)
"Government agencies and others often confuse and imprecisely use, interchangeably, the terms formaldehyde and formalin, when they are entirely different chemicals with different chemical properties and from separate and different chemical families."
The conclusion from this controversy is that nail hardeners can be used safely to harden or strengthen nails without significant health risk which is the potential to develop skin irritation or allergy. If used properly and skin contact is avoided, the product may be used safely.
The correct balance of keratin and protein is what makes nails strong and tough. Basically, if these two substances happen to be out of balance, nails can become overly hard (too much of these substances), or excessively soft (too few of these substances). Experts have affirmed that excessively soft nails will never have the toughness of a healthy natural nail, and that if the nail becomes too hard it will become brittle and break.
If you are searching for a nail hardener without formalin or formaldehyde, there are some new products on the shelf or available through the internet. It's basically a personal judgment call. Read labels thoroughly, whenever possible, question a product or ask a professional manicurist if the product is safe and reliable. If you must use a nail hardener, don't use it regularly. It makes good sense to apply it only to the tip of the nails where cracking, chipping and peeling occur.
What's the bottom line? Nail builders are protein-containing liquids advertised as capable of nourishing or feeding your nails. Since nails are composed of nonliving protein, they cannot be fed or nourished from the outside. However nail builders can fill in irregularities and pitting which allows nail polish to be applied more smoothly.
Try this home remedy for cracking, splitting or bending nails. It has brought good results and contains easy to find ingredients:
- Pour � cup of warm water into wide a glass container (about one cup) with a lid.
- Add � cup of witch hazel to the water and stir.
- Add two tablespoons of glycerin and two teaspoons of aluminum sulfate powder (alum) to the mixture and stir well. Alum can be found on the Internet or purchased at the grocery store from the spice section. Alum is also used in rock deodorant.
- Dip your fingers individually into the mixture each night and allow them to dry thoroughly.
- Repeat every evening for one week and notice the difference in the strength of your nails.
The Right Way to Apply Polish
Some of this information may be a bit redundant, but this is intended to be a step-by-step package to get perfect, colored polish on nails and toes. It helps to know your nail type: dry, brittle or damaged.
- Moisturize cuticles with cuticle oils. Rub in well to penetrate the cuticle and beneath the tip of the nail.
- File nails gently, in one direction, with the fine side of an emery board.
- Wipe off all the oil from the nails with a cotton pad, being careful to avoid touching cuticles or skin on the sides of the nails.
- Do you start with the thumb or the smallest finger? Do whatever is comfortable.
- Select a base coat to work with your nail type
- Polish can separate over time. Roll the polish bottle between your hands. If you shake the bottle, bubbles will appear on the nail when you polish.
- Remove excess polish from the brush using short strokes at the bottle's opening.
- Apply one stripe to the center of the nail and one stripe to each side of the nail, careful to not get enamel on the cuticle or skin surrounding the nail. Thin coats: One layer of base coat, two layers of enamel and one layer of top coat. Wrap the tips of your nails with polish, this helps to prevent chipping.
- If you smudge while polishing, dip the flat of your fingertip in polish, remover and pat the smudge. Paint over with enamel or topcoat.
- Even if the nail surfaces feel dry to the touch after ten minutes or so, don't be fooled. It takes a good hour for nails to completely dry.
- Add a thin layer of topcoat every other day to keep your manicure fresh looking.
Yes, you can do this! Sadly, French manicure kits usually come with worthless guide strips that fall off or allow enamel to seep beneath them. There is another, better way. Here's what you'll need:
White nail polish (typically for the nail tip)
Opaque or nude nail color (for the nail bed)
Clear tape (regular scotch tape is fine. Rolls of manicure tape are now available).
Manicure kit
- Tear off small, finger-width pieces of tape. Stick them to each of your nails, leaving room to paint a tip (pat them down tightly with no air bubbles).
- Paint the tips of your nails white. You can paint over the tape to make a well defined line. Don't paint past the tape toward the base of the nail.
- Remove the tape when the tips are completely dry. Be careful not to ruin your manicure as you do so.
- Paint over the entire nail with non-yellowing top coat.
Hot new nail color trends arrive with every season. Brides love French manicures for the ceremony. Others will be devoted to the French manicure until the next lunar eclipse. But if you're looking for ways to pump up your manicure, then hot metallic colors are for you. Silver, graphite, chrome and platinum nails are replacing pale pinks as the color of the season. If you're a bit hesitant to try these colors, there is a silver shade out there for everyone, whether you want to make a bold statement or a subtle twist on a neutral shade. If you plan on using hot colors such as hot pink, hot green or hot orange, remove the acrylics. The hot colors should be worn with shorter natural nails.
Then again, there's nothing wrong with going au-natural. Pale shades are always a subtle sophistication in simplicity (ivory, off-white, cream and tan). Painting toenails and fingernails the same color are considered boring. Have some fun and paint a metallic color on your fingers and a bold red on your toes.
Nail polish can last a long time. If you have many different colors, when you get around to using a certain color, you may notice the polish has thickened and separated. Rather than throw the polish away, put four or five drops of nail thinner into the polish. Contrary to what you may have heard, nail polish remover will not work for this purpose. After thinning, brush the polish on one nail to determine if it is thin enough.
Consumer Reports had mixed reviews about Avon's Instant Manicure Dry Nail Enamel Strips plus a base and topcoat kit. "Peel, press, perfect." Too good to be true? When tested, the strips weren't a hand's down winner. There was some trouble positioning the strips on the nails (readjustments were nearly impossible) and they were not a good fit for everyone. Lasting power was supposed to keep dry enamel from chipping "up to 14 days." For some it was a week or two and for others it lasted only three to four days. Women who used them were quoted as saying "don't fit everybody nails�.not as easy as it looks�.couldn't get them straight�.they are actually great and they really work." It's a good beginning and an innovative idea.
A buff manicure doesn't mean doing a home manicure in the "buff." Often, the look that is truly chic is the most simple. Some people cannot wear polish, don't have time to do a full-on manicure or do work that would make it impossible to keep polish from chipping. This is where a buffed manicure can be the perfect bling for any outfit:
- Begin with a four-sided buffer to ensure a smooth, high-shine finish. A good choice is the Smooth Operator from the Lippman collection. Start with the side labeled #1 to shape the tip of the nail, sides #2 and #3 to gently dust and smooth the nail and side #4 to gently polish the nail to a high gloss.
- Use cuticle remover and a cuticle pusher to push the cuticle back.
- Use the nippers to cut any hangnails.
- Use cuticle oil to massage the cuticle and a moisturizing cream to massage into the hands and fingers.
- Continue dusting with side #4 to help bring blood to the nail bed resulting in a healthy glow and a silky finish.
How to Paint Flowers on Your Nails
A salon charges extra to add decorative flowers to your nails. So why not do it yourself? All you need is:
- A bottle of white polish (nothing special, a leftover from a French manicure is fine).
- Toothpicks
- A bobby pin (if this is before your time, you can find them in the drugstore).
- If you like adding rhinestones to your design, your local beauty supply sells them.
1. Your nails must be completely dry.
2. Unbend the bobby pin
3. Place a small dab of white polish on a plastic or paper plate.
4. Imagine a flower with five petals and using the tip of the bobby pin, transfer five dots to the desired location on your nail.
5. Carefully use the toothpick to drag the center of each dot into the center of the flower.
6. If desired, dip the toothpick in the polish and paint a few very small dots in the region of the flower. You may add a rhinestone center or leave the flower plain.