A composition is defined as the way the objects and subjects that you're going to draw are arranged, organized, and combined. You may want to arrange the things you're going to draw. You may want to organize them into groups. Also, you may want to combine different things, such as different types of fruit in a bowl.
However, composition can also refer to the way you organize and arrange things in your mind before you draw. It may refer to elements of different photographs that you want to draw and how you combine aspects from the scenes of each photograph into one drawing. The composition is the arrangement of the subjects and objects in your drawing. The composition of your drawing can engage and captivate anyone who looks at it ...... if it's strong enough.
The Rules of Composition There are several so-called rules of composition, but the best thing we can give you is a guideline that you can work with to create strong compositions. The more you draw, these things will become second nature to you because you'll be able to see with your mind's eye what's needed in your composition -- or if something's missing.
You need:
- A focal point. This is the center of interest, the one thing in your drawing that makes someone look.
- Contrast. Light and dark values. These create shapes, forms, and shadows.
- Lines. Line guide the person who's looking at your picture to look at other sections. No, we don't mean arrows. Let's use the bowl of fruit as an example again. The lines of the banana lead someone's eyes up and to the left to where a glass of orange juice sits beside the bowl. The line of your subjects or objects should direct viewers to other areas of your drawing. Just remember we're talking about natural lines, not directional lines.
- Negative space. This is space that's not taken up by your focal point or an important subject.
- Overlapping. If you're drawing a still life of a bowl of fruit, you don't want the fruit lined up side by side. You want them to overlap or layer. Overlapping adds depth. It also adds unity.
- Proportion. You don't want a huge banana and an orange the size of a grape. You need to give enough space to the different aspects of your drawing.
How to Create a Focal Point
The focal point is the part of your drawing that attracts the most attention. Perhaps it's the most prominent subject in your drawing, or maybe it's the most interesting and all other things around it just lend to the focal point. Whichever the case may be, creating a focal point in your compositions is critical to your drawing. A strong composition lends to a captivating, interesting drawing. If you don't have a focal point, the drawing is less interesting and less likely to be complimented by others -- no matter how good of an artist you are.
Below we've listed some methods you can use to emphasize your focal point. You may be able to create focal points on your own without a problem, or you may find this information enlightening and helpful.
- The focal point should never be the center of your composition. Always place it off center. The reason is it demands full attention. People look at that and don't see anything else. Instead, place it off center. Everyone's line of vision automatically goes to the center of an image first, so let your viewers' vision stray over to your focal point. That way, they see your whole drawing and feel the full impact.
- Use secondary focal points. Secondary focal points are less interesting subjects that you put near your focal point to draw attention to it.
- Let objects within your drawing "point" to your focal point.
- Use stronger contrast and more detail on your focal point than on other objects and subjects. You want it to stand out.
Balancing Subjects and Objects
Make sure you balance the objects in your drawing. If all your subjects in a drawing are the same size, then it works out perfectly. But if they're not, you could have a drawing that looks lopsided and out of balance.
You can create balance by simply planning your drawings. Plan your values and your shapes. Just as you don't want all big objects on one side of your drawings and all small objects on the other (lopsided), you don't want all dark values on one side and light on the other. So again, plan your drawings. Study the shapes that the different values create. Study the shadows and highlights. Note the different values. You don't only want to balance the shape of your objects, you want to balance the values and the shapes those values create.
Proportion
As you plan your drawing, you're also going to have to decide the size of the subjects. The proportion of your subjects is important, but it's all up to you. Perhaps you want to make your focal point larger than the other objects. Maybe you still need to decide on your focal point. You also have to decide how much space the focal point will take up, and plan out the negative space. Taking time to plan all of this will insure a more captivating drawing and an engaging composition.
Types of Compositions
Composition types refer to ways that you can arrange, organize, and combine objects. Of course, you can organize yours anyway that you want, but these types will help you organize the composition and place your focal point.
"S" Composition
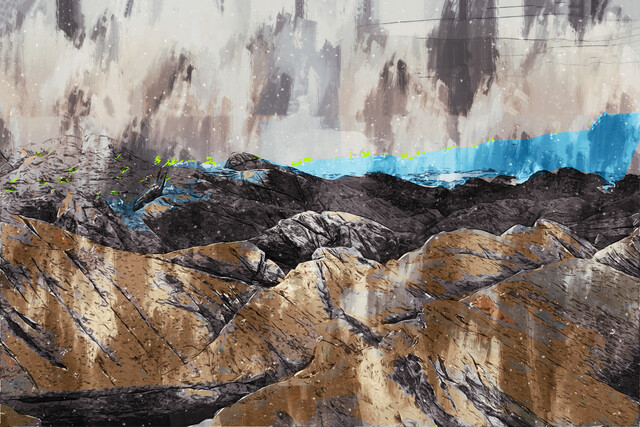
The subjects form a shape similar to the letter "S." The composition is fluid and graceful. This is a perfect type for landscapes where a river or trees flow through the drawing.
"O" Composition
For this type, you draw your subjects, objects, values, and lines to form an "O." Your focal point goes in the center of the "O."
"U" Composition
This type typically has vertical subjects on either side of the drawing with a horizontal line between them, forming the "U." You can use this space for the focal point if you want, or leave it as a resting space for the eyes.
"L" Composition
An object, subject, or vertical mass on one side of the drawing with an open area on the other side. It also has a horizontal base, which forms the "L." Your focal point can the object on the left hand side, or it can be in the open space. The choice is yours.
Tunnel Composition
A view through a doorway, keyhole, window, or the view from between trees or mountains.
Grouped Mass Composition
An arrangement of several objects of different shapes of sizes grouped together. Great for a fruit bowl still life!
Radiating Line Composition
In this type of composition, several lines lead to a point. This point is the perfect place for a focal point. A roof, a building, a fence, or lines of trees can form these lines.
Planning Your Composition from Photographs Drawing a photograph can be overwhelming. That said, drawing photographs can be a little more complicated.
The first thing you want to do when drawing a photograph is to study it. There are things you don't see when you just glance at a photo that you'll see when you study it. Notice the different objects, the values, the sizes of the objects and the shapes made by the values.
Next, make a copy of the photograph if it's something you want to keep. Once you have a copy, draw grid lines on the photograph. If the photo has a lot of detail, use small squares. If there's not a lot of detail, use larger squares. This will help you to place everything in the right spot, and it will make it a lot easier to draw everything you see. It won't be so overwhelming.
Here are some more tips:
- Draw a grid on your drawing paper too.
- If you want your drawing to be larger than the photo, make sure the grid you draw on your paper is proportionately larger than the grid squares on the photo.
- Draw the grid lines on your paper lightly so you can erase them later.
- Draw one square at a time. Draw what you see in a square of the photograph onto the corresponding grid on your paper.
- Don't be afraid to "add" things to photographs to make them more interesting. Add a hat to a person. Put a worm in a tomato.
|
Try this:
Pick a photograph that you would like to draw. Create a grid on it, then draw a grid on your paper that's proportionate. You can even go ahead and draw the picture if you want.
|
Drawing Memories
Your memories are a beautiful thing. They are stored in your mind like a treasure, and you can revisit them whenever you want. Now that you're learning how to draw, you may want to put them to paper. Maybe you want to draw your favorite dog from when you were a kid or even a teddy bear. Maybe even a spider that you saw that was fascinating!
Perhaps as you get better at drawing, other people will ask you to put their memories down on paper too. Police sketch artists do this every day and draw pictures of suspects using other people's memories.
We're going to teach you how to draw these memories in this article.
Seeing The Image in Your Mind To bring up a memory to your mind and have a visual of it, you use both your vision (the image from your memory, dreams, or imagination that you see in your mind's eye) and your perception (the manner that you use to understand and process sensory information).
Your sensory information is fed to you from your five senses: seeing, hearing, touching, smelling and tasting. Of all these senses, seeing provides the strongest sensory information, and it will be the sensory information that you use the most to draw things that you see in your mind. It stands to reason you can't draw something you've never seen. Even if you've only dreamt about a cute little puppy, you've still seen it. If you hadn't seen it, you can't draw it accurately.
Before you draw, you need to take the time to focus on the object that you want to draw. Close your eyes, and give it your full attention. Focus on all the details. It's almost like memorizing what you see -- as if you were memorizing the details of a house you're standing in front of -- so you can draw it later. Memorize what's in your mind -- that almost sounds funny, doesn't it?
Getting Perspective
Make sure you're memorizing your object at eye level because it will be easier to draw. Remember, you're going to have to draw perspective. It's much easier to add perspective to things at eye level, especially when you're not going to have the object in front of you to reference as you draw. True, it will be in your mind, but because it's in your mind the perspective will be harder to replicate if it's not at eye level.
Look at the object from all sides if you can. This will help you draw it better. How does that cute puppy look from the side? Does it have a white patch of fur on the left side of its face, but not on the right? These things will help you create a more accurate drawing, but also a more realistic looking one.
Selecting a Viewing Distance Details and clarity fade away the further you are away from something. Let's refer back to our cute little puppy example. If you are seeing him in your mind as far away from you, perhaps you don't notice the dark spot on his eye, or the slight scar above his nose. Plus, if you see an object from more than thirty or forty feet away, it starts to look blurry. If you're too close to an object, however, you can't see all of the outline and structure. Being too close to a puppy means you might only see its eyes and snout.
The ideal viewing distance is just far enough away that you can see the entire object or subject, but close enough that you can see details. The composition that you select will also determine how close or far away you need to be from the subject.
Find an object in your home that you're familiar with. Look at it from the other side of the room, close to your face, then from the middle of the room. Notice how much detail you see from each distance. This will help you to determine the viewing distance you want to use when you draw your memories.
Memory Formats
There are several formats that memories are stored in your mind. The two that we're going to talk about are verbal and visual because these are the ones that are used to draw the most.
Verbal memories are when you remember an object with words. You can give a very detailed, concise verbal description, and it's what provides you with a visual image. Perhaps you can describe a scene from a vacation, and see it in your mind.
Visual memories are those that you can see in your mind. These types of memories will probably be the easiest for you to draw, but everyone's different.
Just remember that your memory is the strongest immediately after you see or experience something. Information starts to fade away within minutes. As you start to draw, you'll want to do a rough sketch of memories that you want to recreate as soon as possible. If you see a cute puppy that you think would make a cute drawing, do a rough sketch of it as soon as you can. You can wait, but if you wait more than 48 hours, it can become difficult to remember all the details.
|
Try this:
Think about an object that you see every day in your home, then attempt to draw it from memory.
|
Drawing Verbal Memories
If you draw other people's memories, you're going to be drawing verbal memories. Forensic artists and police sketch artists do this every day. It may sound hard to do, but it's not much different than drawing from your own memories once you learn how to do it.
When drawing verbal memories, you rely on the spoken details to tell you what you are seeing. If you need to, make a list of the details as someone tells you or as you remember them when you are first starting to draw from verbal memories. Then, use those details to construct your drawing.
|
Try this:
Ask a friend or family member to describe a person or animal to you. Have them give you all the details about it. Draw it as they tell you about it. You can even ask questions to guide their memory along. Start out with the overall shape of the subject, then add details.
|