Objectives
In this article, you will learn the key components of creating your own natural skin care products. We will explore techniques for managing your ingredients, the easiest recipes to mix up initially, as well as tips for quick cleanup and actually using your creations.
Section 1. Prepping Your Ingredients
Once you have selected a recipe that you would like to make, it's important to prep your work space and all of the ingredients to ensure that things go smoothly. There's nothing worse than being in the mixing or pouring stage and you realize that you are missing a key tool or ingredient.
Below are some tips for prepping to make your product:
-
Set up your tools and ingredients on a wide, flat workspace, covered with newspaper or a plastic cloth that can be easily wiped.
-
Mentally go through the steps of creating your product from start to finish and ensure that you have everything you need for each phase.
-
Ensure that your bowls, utensils and other tools are clean and dry to avoid bacterial contamination and separation from water
-
Arrange your workspace with the items that you will be using first in the front
-
Check any appliances or tools that you will be using to ensure that they are functional
-
Tie up your hair and don an apron and gloves if needed
-
If you like, pre-measure your ingredients so that you do not have excess ingredients in the way once you begin
Section 2. Mixing Techniques
Now that you have prepped your work space, it's time to get to work! Depending on what you are making, there are specific techniques for melting and blending your ingredients. Below are helpful tips for working with ingredients in the most commonly made products.
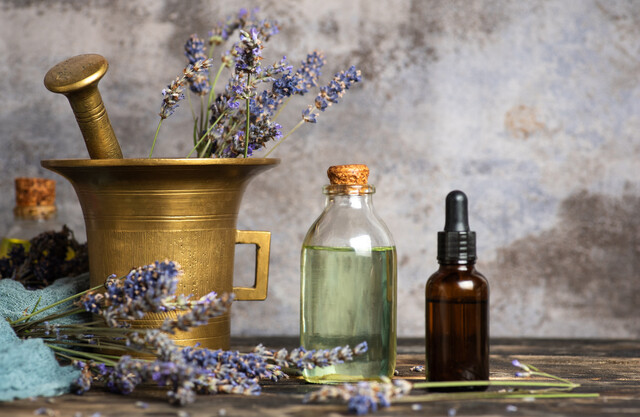
Beeswax- This is what provides thickness to your product, similar to the way flour thickens gravy. Beeswax comes in hard blocks or pellets and has to be melted down in order to be used. This is done either in a double boiler, or in a Pyrex cup or bowl immersed in boiling water.
To melt the wax, make sure the bottom of the boiler or pot has an adequate amount of boiling water. Place your wax in the top section or the glass cup. If you have purchased a large block of beeswax, cut it into small squares before trying to melt it.
After a minute or so, you will see the wax slowly begin to liquefy. As it melts, you can stir slightly to distribute the wax across the bottom and speed up the melting process. When melting the beeswax, make sure that you have your other ingredients ready, because if allowed to cool before mixing, the wax will begin to solidify and your product will have a grainy or chunky consistency.
Solid Butters such as Shea and Cocoa butter can also be melted in the double boiler. Because they are softer than wax, some people prefer to use the microwave to soften them quickly. Some purists recommend against this, as they feel the microwave denatures the butter and can overheat it. If you do use a microwave, melt the butter in 15 second intervals, stirring in between. This should ensure that you do not overheat or accidentally boil the butter. Again, once cool, natural butters will solidify, although usually at a slower speed than beeswax.
When adding Natural Oils to your balms and lotions, be sure to pour slowly, a bit at a time. Whip with your electric hand mixer in between to test the consistency. If it is still too thick, you can add more oil. If, for some reason, you accidentally thin it out too much, whipping in a bit of beeswax or cornstarch will help restore balance.
Scents, Essential Oils, Dye, and Liquid Preservatives are always added last. When you are initially mixing, make sure to allow for the amount of liquid that you have to add at the end, so that your product does not come out too watery. For example, if you plan to add two spoons of honey and twenty drops of essential oil, your mixture should be slightly thicker than you want, as it will thin a bit once you add those items.
When adding Honey to lotions and balms, add it in when the mixture is still slightly warm, but not hot, and blend well with the electric mixer on high speed. This helps to avoid the separation that many people complain of.
Section 3. Bottling Your Projects
When bottling your creation, there are a few things you should know which make the process easier and less messy.
-
Use a small syringe or spoon to fill lip balm tubes and tins. If your mix is still warm, you may be able to pour it into larger tins.
-
You can use a clean turkey baster or large syringe to suck up lotions and oils, then squeeze them into your container.
-
A flexible plastic spatula is the best way to deposit and smooth creams and body butters into shallow jars with little mess.
-
If you plan to label your containers, wait until they are filled and you thoroughly wipe the outside, in order to avoid oil smudges.
Section 4. Quick Cleanup Tips
As with any project, cleanup is the least desirable part of the process. However, with some advance planning and using the "clean as you go along" method, you will have an easier time.
Below are a few tips for a hassle-free cleanup:
-
Clean anything with wax immediately -- especially your blender blades, so that it does not harden. If that does happen, submerge the item in boiling water to soften the wax again. If need be, scrape the wax off with a blunt butter knife.
-
Have a tub of hot, sudsy water ready to deposit oily bowls and utensils into. This helps cut the grease and makes washing easier.
-
Have containers nearby to pour or place excess ingredients into.
-
If you used newspaper or a disposable tablecloth, gather it, along with any shavings etc, and place it into the trash.
-
Be sure to sweep the floor immediately to avoid bits of wax and other ingredients becoming smashed into the floor.
Unless you will be using your products immediately, you need to think about ways to ensure that they do not go rancid. Any products made with water as a base, such as lotions can easily breed bacteria and other microbes. If your product base is oil or vegetable butters, it can maintain purity longer on its own. In order to withstand travel across long distances and extended shelf lives, most commercial products contain chemical preservatives. However, many of the commonly used preservatives have been shown to be toxic and can cause a number of mild, to serious health concerns.
The most common chemical preservatives are:
Parabens, which are a group of chemical preservatives, include methylparaben, propylparaben, butylparaben and ethylparaben. This is the most frequently used class of preservatives, but perhaps also the most harmful. Side affects of paraben exposure over time includes eczema, skin cancer, breast cancer, thyroid dysfunction. Though still widely used, some products are now displaying "Paraben Free" on the labels. Note that this doesn't mean the product is free from other harsh chemicals.
Phenoxyethanol is a chemical preservative that is touted as a safer alternative to parabens; however, it is not without risk. The FDA has stated that phenoxyethanol can cause central nervous system problems, irritate skin, and induce vomiting. In addition, this chemical can cause reproductive problems in high concentrations. This doesn't sound much safer at all.
When making your own skin care products, there are numerous natural preservatives that can be used with varying degrees of effectiveness.
Below are some common natural preservatives you may want to try:
-
Grapefruit seed extract is one of the most popular natural preservatives, as it is a broad spectrum anti-microbial agent. The preservative agent is extracted from the seeds and pulp of the grapefruit.
-
Vitamins A and E enhance the effectiveness of skin care products, as well as extend the shelf life. These natural preservatives can allow products to be used over a period of weeks to a few months
-
Essential oils have astringent, antibacterial, and antimicrobial properties and can be used as a natural preservative. Some that have been used as preservatives include clove, eucalyptus, sage, sandalwood, lemon, rosemary, and lavender oils.
If you are making products for your own personal use or for friends, making small batches that will be used quickly can alleviate the need for complicated preservative choices. However, if you ever plan to sell your projects, you will need to ensure that they can pass testing for preservative stability and long-term shelf life.
Conclusion
Gifting or Selling Your Creations
Objectives
In this section, you will find information to help you in sharing your formulations with the world, either as gifts, or through commerce. You will learn about the steps that are necessary to set up a skin care business and bring your products to the public.
Section 1. Giving Your Creations As Gifts
For many people, making their own skin care products is a relaxing hobby that allows them to ensure the purity of what they put on their skin. However, they are not interested in selling their formulations commercially. If this is the case for you, you may still want to gift family and friends with some of your home made beauty products.
If you will be giving your creations as gifts, keep the following considerations in mind.
-
Ensure that the recipient is not allergic to any of the ingredients you used.
-
Make sure that you place the formulations in airtight tubes, bottles, or jars.
-
Depending on what preservative you used if any, let the recipient know what the shelf life of the product is.
-
Include a little card with instructions for use.
-
Purchase gift bags or boxes to place the products in.
-
Solicit feedback from recipients to help you improve on your creations.
Homemade beauty products make wonderful gifts, especially when formulated in the favorite scent or texture of the recipient. Many people make large batches to distribute as gifts for the holidays. You can also make a personalized spa basket for mothers-to-be, or other special occasions.
Section 2. Selling Commercially � Product Setup
For those who want to turn their hobby into a business, there are specific components that must be taken care of in order to be successful. Below is a checklist of some of the basic elements of getting your skincare business off the ground.
Wholesale raw materials - If you will be selling skin care products on a consistent basis, it is important to research and select a reputable company to get your raw materials, such as vegetable butters and oils, beeswax, and essential oils.
Often, you will be able to acquire the majority of your ingredients from one or two main wholesale suppliers. However, if you are concerned about getting the lowest price, you may want to buy specific items from suppliers who specialize in just those products. Because they specialize, the price may be lower than a more general supplier.
Bottles and Jars - These can be purchased in bulk and you usually receive a discount, the larger your order. When purchasing containers, think about what will be filling them, and how it needs to be dispensed. For example, for a thinner lotion, you may want a bottle with a pump instead of a pour spout to avoid spills and wasted product. Also, it is a good idea to order a sample pack of containers you are considering, in order to gauge their strength and appearance accurately.
Labels - If you are selling skin care products, it's important to understand that the visual appearance of the product is just as important as the benefits it imparts to the skin. A big part of the visual equation is the choice of label and graphics.
You have many options when it comes to labels. If you are on a budget, you can design your own labels and print them out on your personal laser jet printer. However, this option does have its drawbacks. Depending on the type of labels and your printer's capacity, you may not be able to make waterproof labels. In this case, know that there is the risk of the contents of the container leaking and smudging the label.
Another option is to take your design to a copy center and request clear or colored water- and oil-proof labels. This may be slightly more expensive, but is worth the peace of mind. There are also companies on the internet that allow you to submit a design online, and they will create labels based on your specifications.
Below are a few technical and design suggestions to consider when creating your labels:
-
Develop a logo for your company/products. It does not have to be overly intricate, but should clearly express your brand personality and differentiate your company from others in the marketplace.
-
Write up an ingredient list for each product. It is required by law that ingredients be listed based on the amount of each in the formulation. The ingredient which is found in the highest amount should be listed first, then the rest of the ingredients in descending order.
Also, ingredients should be listed by their scientific name, as well as their common name. For example, shea butter should be listed as: Shea Butter (Butyrospermum parkii)
-
The label should also list the weight/quantity of the product, as well as a short product description.
-
Instructions for use should be listed on the back of the label.
Include contact information for your company, which can consist of web address, phone number, or email.
Once you have your supplies in hand and packaging designed, the next step is to map out how you will get exposure for your product line, and what your distribution channels will look like.
Craft fairs and other events are great places to test the market for you product. You can scan your local newspaper or online bulletin board for listings of upcoming events. You can usually purchase a table or booth at these events for a small fee, and can set up your display to conduct business for the day.
Placing Your Products in Stores and Spas
If you would like to secure distribution in stores and spas in your region, then you need to develop a proposal for store owners highlighting the benefits of your product: how it is different from others on the market, and how stocking your products will benefit their business. This document should also include wholesale pricing information, draft contracts and any other documentation you feel is required.
It is relatively easy to set up shopping online. Many companies, such as Yahoo offer inexpensive online storefronts that you can use to showcase and sell your goods. These services also often have payment integration services that allow you to accept credit cards, or you can accept payment easily through Paypal.
If you are more ambitious, or want a higher level of professionalism and control, you may consider hiring a web designer to create a custom e-commerce website for your company. The pricing for this varies based on the specifications of the site and how many items you will be showcasing.
If you are looking to establish an online presence with little effort and overhead, you can showcase your products on websites specifically for crafters, such as Etsy.com. These sites provide a virtual storefront and marketplace in exchange for a commission on sales. This is an easy way to get up and running online quickly for a minimal financial outlay.
When in business for yourself, it is critical to keep a keen eye on your finances, expenditures, and profits. It is easy to get caught up in the excitement of making and presenting your products to the world. However, without clear financial projections and oversight, you could be driven out of business very quickly.
Below are some key areas of consideration regarding managing the financial side of your business:
-
If you will be selling from your own website, you may want to open up a merchant account with your bank. This will allow you to accept credit cards and checks, without using Paypal as a processor.
When researching merchant accounts, be sure to read the fine print, as some banks charge a fee per transaction, while others charge a flat monthly rate. Some banks also may process a set number of transactions for free, but apply a fee to any over a specified amount. When selecting a bank, keep in mind your goals for the growth of your business, and ensure that this particular institution can grow comfortably with you.
-
Research your market and set your prices based on the quality of your product, your expenses incurred in making the products, desired profit margin, and what the market will bear. You want to build in enough of a cushion to allow expansion and the ability to maintain a good amount of supplies and products in stock.
-
Set up a bookkeeping system that allows you to clearly see how much you spend for supplies, how much revenue comes into the business, etc.
-
Make sure to put aside a portion of the profits to reinvest in your company, pay yourself a salary (this may take some time), and generally maintain positive cash flow. You do not want to use profits as soon as they are made, as that may put your business in a precarious situation in the event of an emergency or a pricing change from a main supplier. Having the flexibility of cash on hand will allow your business to be flexible and resilient.
-
As you grow your business and seek to expand either your online presence or into a traditional storefront, seeking investors can provide the financial wherewithal to achieve your dreams of expanding your business. You can either approach potential investors directly, or look to secure a grant or loan from your local bank or small business support center. In either case, the investor will want to see proof of solid performance and your plans to increase revenue in order to make the investment worth their while.
Food for Thought
Have you imagined how you will use the products you create? Do you feel more comfortable sharing your creations only with family and friends, or are you ready to branch out into commerce? How might you test the waters?
Conclusion